
June 14, 2018
Skinny Strip Piecing: My Process
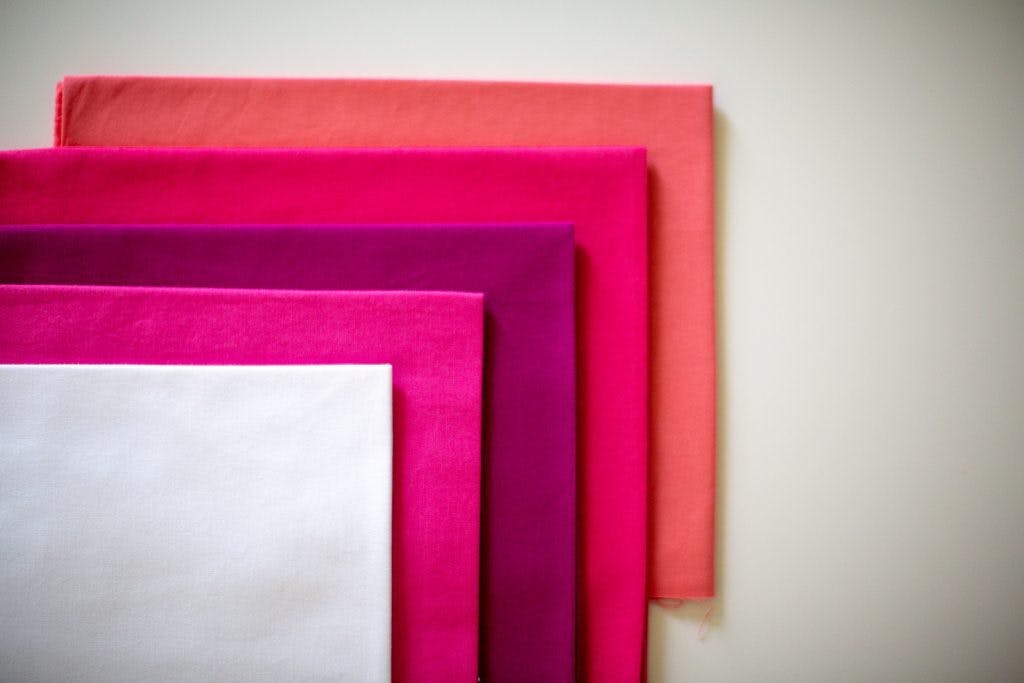
Thanks to Riley Blake Designs for sponsoring this blog post and allowing me to navigate how sponsorship best fits in with my goals of teaching, sharing, and inspiring! This blog post features fabric from the Riley Blake Designs Confetti Cottons line, available here.
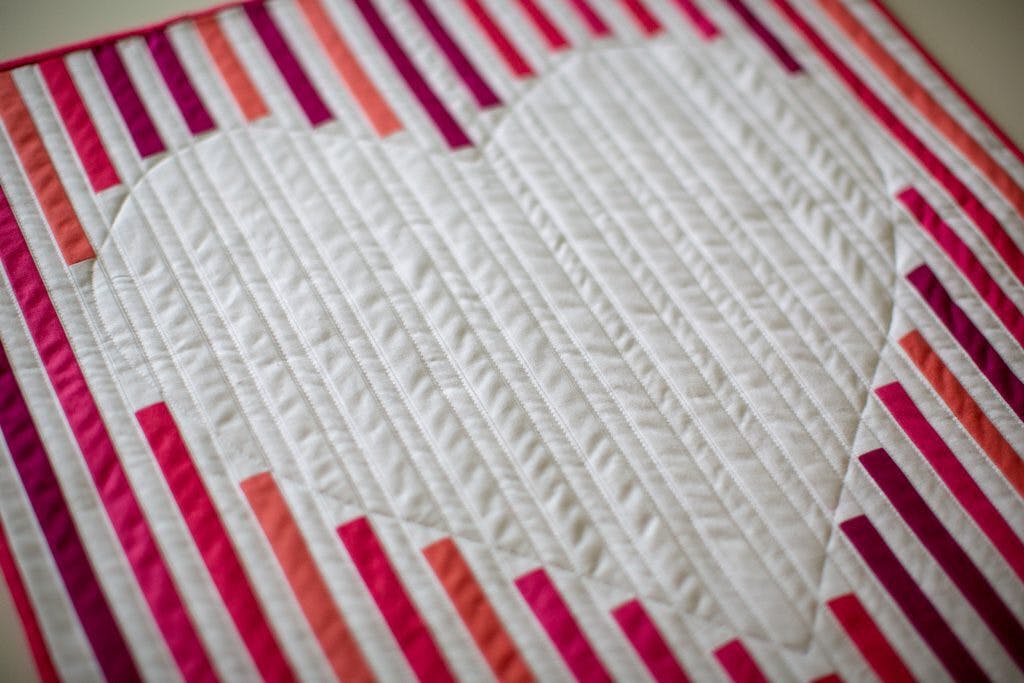
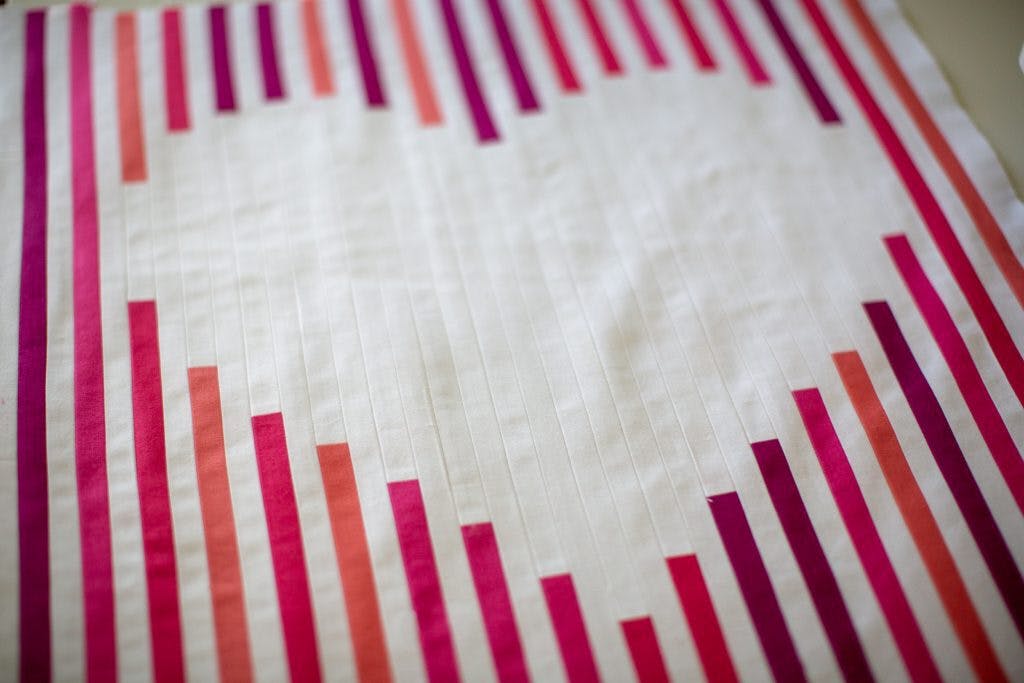
Hi there! I get asked a lot about how I sew accurate skinny strips (strips finishing at 1/2" width). I love mixing the hard geometric lines with bright, colorful fabric and quilty texture. Below is my process for getting crisp, accurate piecing. Like any quilty tips, if you have another way you are already comfortable with, carry on :)
Prewashing
I wasn't prewashing up until about a year ago, but now I do and I'm not turning back. I think it's a matter of preference, but for me, prewashing and pressing gives me a sense of routine and preparation as I start any project. It can also be helpful to preshrink fabric if you are working with fabric of different substrates.
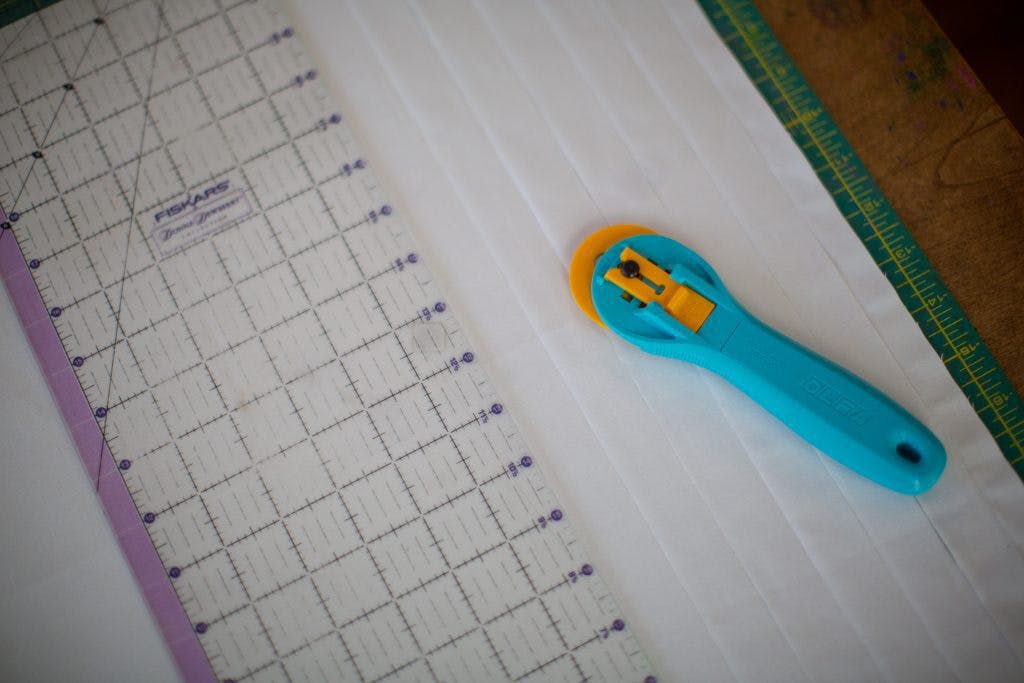
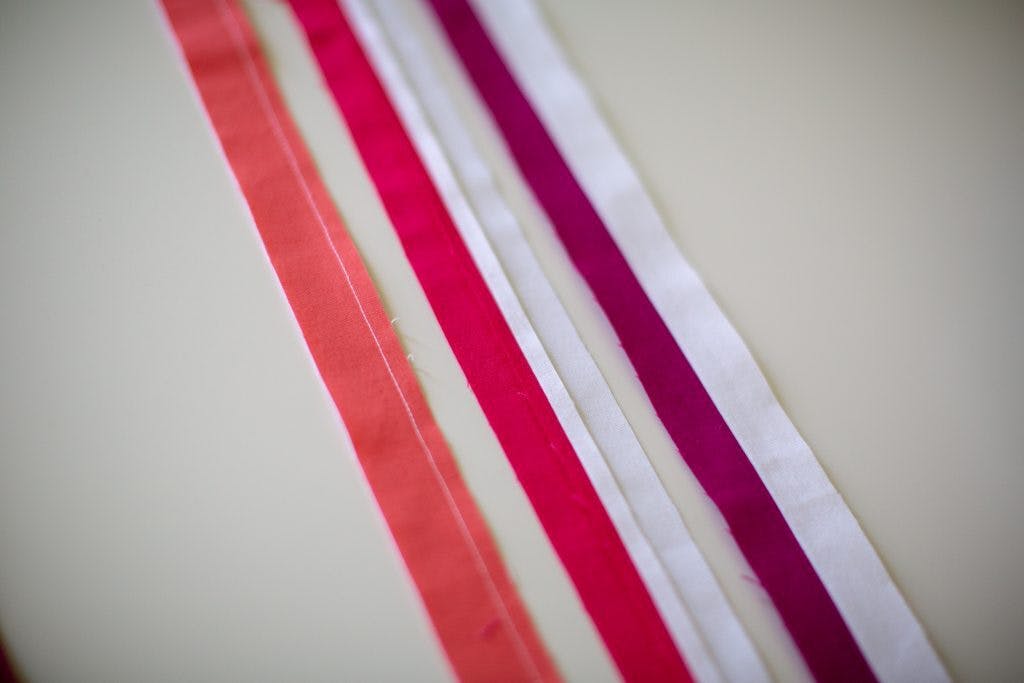
Cutting: With Accuracy!
I've had a lot of practice cutting 1" strips! I used to cut with a rotary cutter pulling towards me, but one bad finger injury led me to work through the muscle memory learning to cut away from me, correctly. It took a little while to correct from those bad habits.
I usually cut fabric with my rotary cutter and mat on the kitchen table using my upper body weight. My sewing teacher, Kathleen Baden, suggests allowing 5 - 7 seconds per cut as a guide. If I'm cutting a length greater than 12", I reposition my left stabilizing hand as I move the blade along with my right hand. If I'm cutting strips, every so often I re-set my fabric and trim off excess and begin again cutting strips.
Pinning: Not by Default
I don't pin by default when sewing strips (gasp!). And what I mean by that is that if I'm sewing two simple strips together or two pieced strips together and it doesn't matter where the strips line up, I skip the pinning. My reasons for this are:
- Removing pins while sewing a strip can cause the fabric to "jostle" to the right or left, resulting in a unstraight stitch.
- Sewing over pins (not recommended) can cause unstraight stitch lines as well.
I typically pin when I'm lining up points, or I occasionally glue baste.
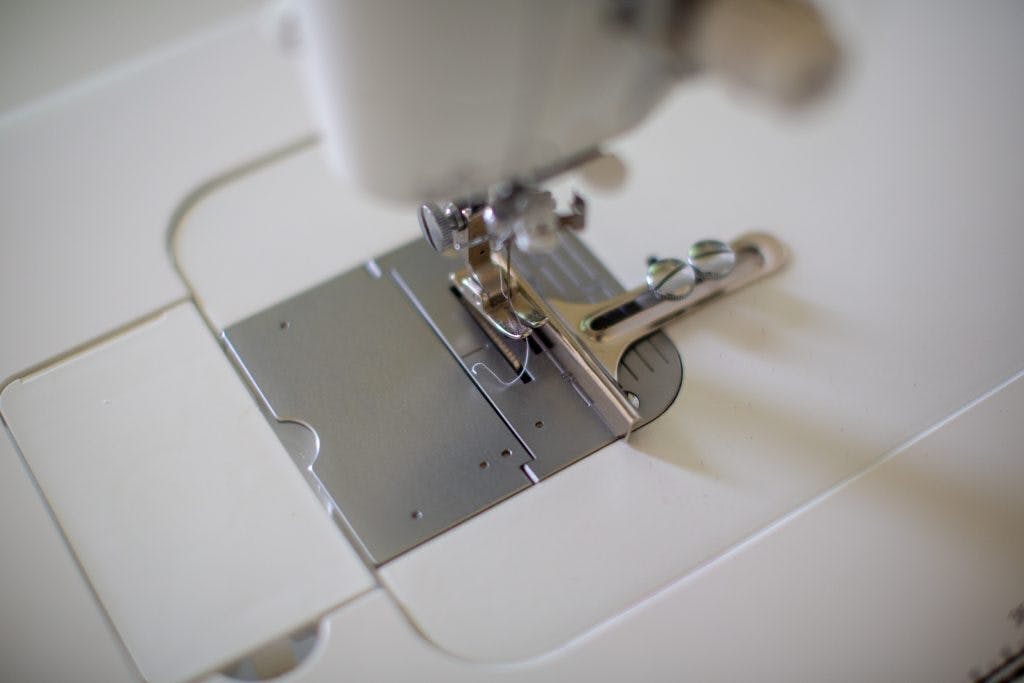
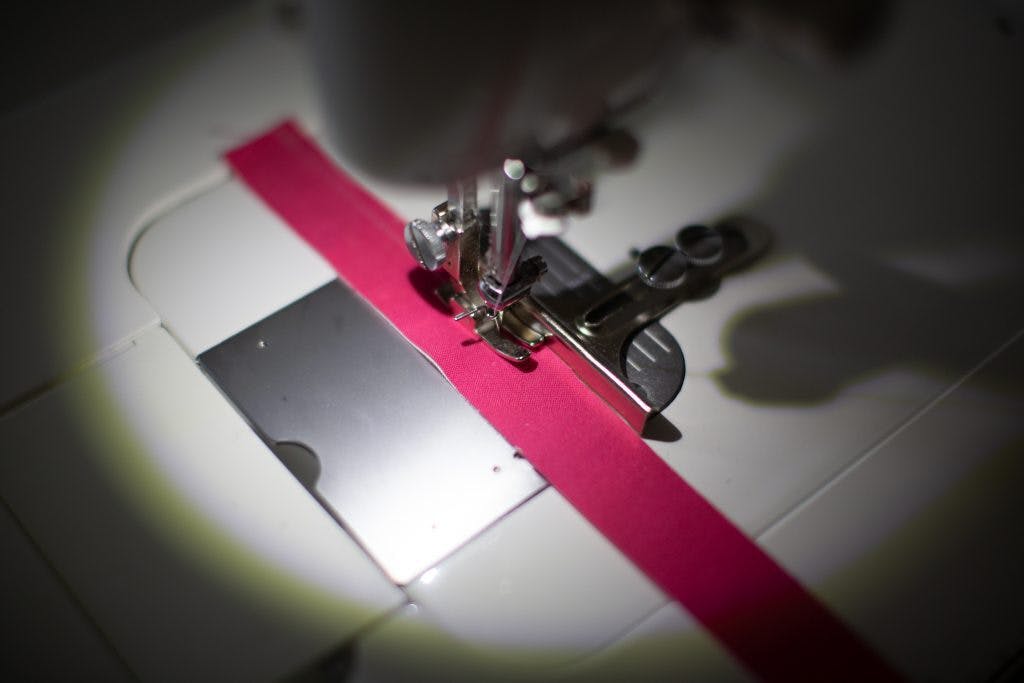
Quarter Inch Foot or T-Gauge
I was using the standard 1/4" Juki foot that came with my machine, but I've most recently switched to using a T-Gauge to get a bit more scant 1/4" seam (thanks to Andrea of 3rd Story Workshop for this suggestion!). This is a matter of preference and machine accuracy as well, but I did find that the 1/4" foot that came with my machine wasn't scant enough for me.
Pressing Matters
After sewing, I press each seam 3 times. First, I press the finished seam closed to reduce remaining wonkiness, then open, then from the front. I don't starch, but I use a lot of steam.
While pressing, I make sure I'm not manipulating the fabric to introduce any curves. My ironing board has a grid on the cover, so most of my pressing is to conform to the straight line and not introduce wonkiness.
Conclusion
Like many sewing related skills, my accuracy has come with practice and improvement over time, and applying patience to each individual step. Although my friends will tell you I have no patience ;)
Hopefully, this helps give you some ideas to try to incorporate into your process, if you so desire :) Thanks for reading and thanks again to Riley Blake Designs for sponsoring this post!