
August 17, 2018
Donut Quilt: August 2018
Design

The inspiration behind this quilt is that I wanted to make a donut quilt for a particular show challenge (it hasn't happened yet). I played around with a few designs in Photoshop, and sent one that I thought was good to my open sew den mom, [Kathleen Baden](https://kbquilts.com/). In more words or less (less words), Kathleen was not a fan of the design, but more importantly, she commented that my design wasn't really "me".
I normally don't put a ton of weight into feedback from others when I'm working on designs, but in this particular case, she was right, and I was feeling vulnerable in the _"Oh sh\*\*, people are watching me, I better not screw up"_ sort of way. So, I went back to the design and iterated on it, but focused on making it more geometric and less representative.
At the same time, I had been very inspired with embroidery stitches and I experimented using arrowhead stitches in a circle in Photoshop. I tried a few different sizes with and without nesting. I shared the black and white design on Instagram, but I tabled the design because I had a few other projects in my queue.
Piecing Details
Back when I shared the black and white design, I commented that I would have to paper piece it. But in the months since I shared that original design, I realized I could piece it via traditional piecing with templates. A couple of comments on Instagram led me to realize that templating was an option, and my preferred option over paper piecing. I reworked my design a bit in Photoshop with a single outer ring and printed out 8.5"x11" section to print, and cut paper templates from it.
With my paper templates in hand, it was pretty straightforward piecing (inner colored strip/piece, outer colored strip/piece, inner gap, outer gap), effectively braiding the pieces that curved every so slightly each round (11.25° to be precise). I used strips leftover and cut from another quilt, and cut 32 pieces from each of the two template pieces. You can see the process in my photos below.
At the end of the 32 rounds, I had one Y-seam to join the circle. I machine appliquéd a center circle onto the inner donut, and then I appliquéd the entire donut onto a background. This approach is similar to how dresden blocks are finished. While I have never made a dresden block, I was familiar with the technique.
Quilting
I made my quilt sandwich with Warm & Natural cotton batting and backing fabric, and machine quilted with my walking foot using Aurifil 50 weight white thread on my Juki. I did a mix of straight-line and curved lines, and I have a new respect for those that do a lot of curved quilting because I found it challenging.
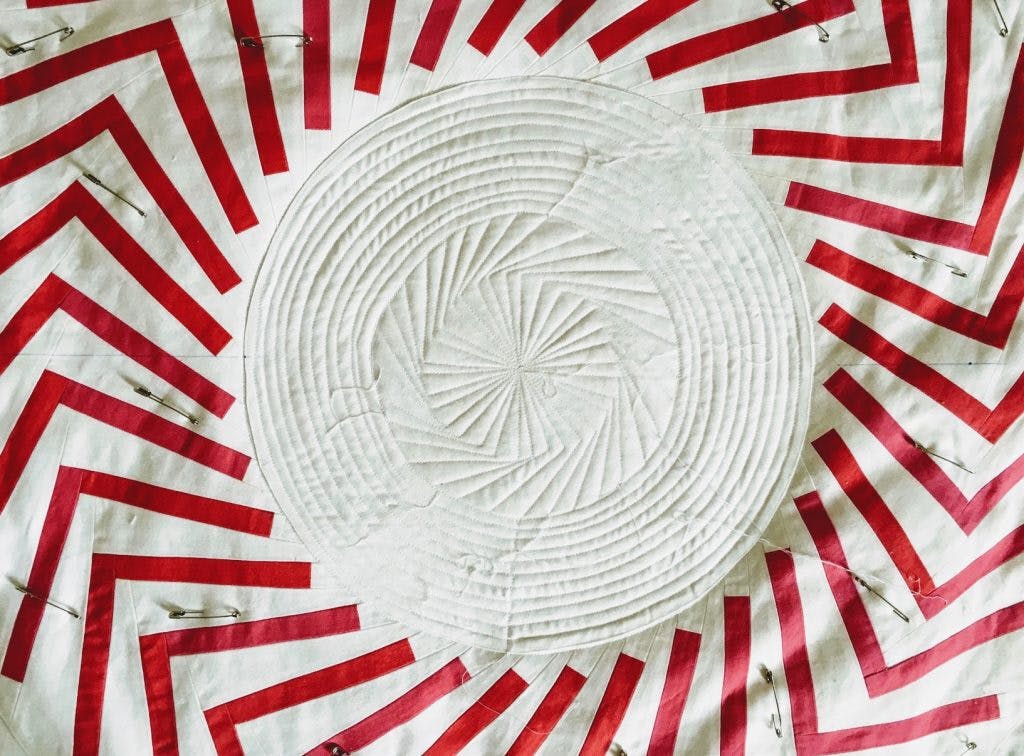
Center quilting, before it was ripped out.
I did a straight-line quilting in the center "dot" of my quilt to mirror the donut pattern, but then I ripped it out!! I'm not a huge marker during quilting, and ultimately I felt that initial quilting was imprecise relative to the precise piecing, so I took it out and reworked that middle section. On the bright side, my extra effort here didn't add too much time (1-2 hours, maybe?).
A funny story about ripping it out: I asked the husband if he liked the updated quilting and he said, "It looks good!" Then I asked him if he remembered what it looked like before, and he said, "Nope."
Finishing
I finished the quilt with 2" white binding. I machine stitch the top / one side of the binding, and hand stitch the back binding via silk thread. Nothing too out of the ordinary for me there. I will add a sleeve at some point for it to (hopefully) hang in a show.
Anyways!
Anyways, that's the story behind the donut quilt, and my process photos are shown below. There's been some interest on making this a pattern, and this might be a good candidate for that, so stay tuned. Thanks for following along and happy sewing!